Imagine your home as a ship, and every leak is a small hole threatening to let in the sea. Tackling these leaks can save money and give you a sense of accomplishment. You’ll find that common culprits like dripping faucets and leaky pipes often require only a few basic tools and a little know-how. However, not every leak is as straightforward as it seems. So, before you grab the plumber’s tape, let’s explore which issues you can handle and when it might be time to call in the pros.
Identifying Common Leak Sources
Before starting any repairs, ensure you’ve turned off the water supply, then carefully inspect areas like faucets, pipes, and water heaters, where leaks commonly originate. Examine faucets for drips; worn washers or faulty O-rings often cause these. Gently lift the handle to see if water continues to flow. If it does, disassemble the faucet to assess the internal components.
Next, the exposed pipes will be surveyed for signs of moisture or corrosion. Pay special attention to joints and seams, where leaks are more prevalent. Run your hand along the pipe’s surface, feeling for dampness or condensation. Listen for running water when all fixtures are off for concealed pipes—a potential indicator of hidden leaks.
Inspect your water heater by checking the pressure relief valve and drain valve. Leaks typically manifest as puddles around the base, indicating a possible malfunction. Don’t forget to check the appliance’s connections and fittings for any sign of water escape. If you detect a leak, verify the area is dry and free from electrical hazards to prevent accidents. By identifying these common sources, you’re proactively serving others by preventing water waste and potential property damage.
Tools Needed for Leak Repairs
Gather essential tools like a pipe wrench, plumber’s tape, and a basin wrench to tackle leak repairs while guaranteeing safety and accuracy efficiently. The pipe wrench provides the leverage to loosen or tighten pipes without damaging them. Maintain a firm grip to prevent slippage. Plumber’s tape, also known as Teflon tape, is vital for sealing threaded pipe joints, and preventing leaks at the connection points. Wrap it clockwise around the threads three to four times for maximum sealing.
A basin wrench is indispensable for reaching tight spaces, especially under sinks. Its swiveling jaw grips nuts in hard-to-reach areas, allowing you to tighten or loosen them without straining. This tool minimizes the risk of injury by keeping your hands away from cramped spaces.
Safety goggles and gloves should always be part of your toolkit to protect against debris and sharp edges. When cutting pipes, use a pipe cutter instead of a saw for clean, precise cuts, reducing the chance of uneven ends that can cause leaks. Have a bucket or container to catch any water left in the pipes and prevent water damage. Always turn off the water supply before beginning any repair to guarantee safety.
Fixing Dripping Faucets
To fix a dripping faucet, identify the type—compression, ball, cartridge, or ceramic disk—and ensure the water supply is turned off to prevent flooding during the repair. Close the shut-off valves under the sink or the main water supply. Pug the drain once the water is off to avoid losing small parts.
For compression faucets, remove the handle, unscrew the packing nut, and replace the washer. For ball faucets, use a hex key to detach the handle, then replace the cam and washer. Cartridge faucets require you to remove the retaining clip and pull out the cartridge to replace O-rings. For ceramic disk faucets, remove the decorative cap, unscrew the disk cylinder, and swap out worn seals.
Always inspect parts for wear and debris, cleaning the valve seat thoroughly. Reassemble the faucet methodically, confirming all parts are securely tightened to prevent future leaks. Test the faucet for proper operation and make sure there are no drips. Safety glasses and gloves should be worn during the repair to protect your eyes and hands. By resolving the issue, you’re extending the life of the fixture and conserving water, benefiting both your home and the environment.
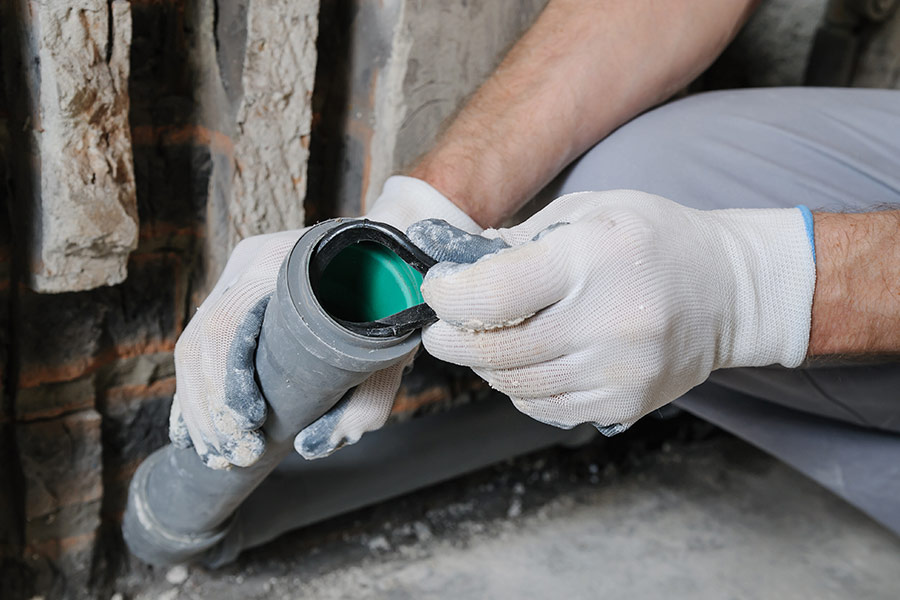
Repairing Leaky Pipes
After resolving faucet issues, tackle leaky pipes by turning off the main water supply, draining the system, and wearing safety goggles to protect your eyes during repairs. Begin by identifying the source of the leak. Look for visible moisture or listen for dripping sounds. Once located, use a pipe cutter to remove the damaged section, guaranteeing clean cuts for a secure fit later. Measure the gap for accuracy and select the appropriate replacement pipe or coupling.
Apply plumbing (PTFE) tape on threaded connections to guarantee watertight seals. Depending on your pipe type, secure the replacement section using pipe connectors, such as compression fittings or push-to-connect fittings. Tighten connections with a wrench, but avoid overtightening, which can damage threads and cause future leaks.
Before restoring water flow, double-check all connections for alignment and security. Turn the water supply back on gradually, monitoring for leaks. Inspect joints and fittings, feel for moisture, or listen for any hissing sounds that indicate escaping air or water. If everything remains dry, congratulate yourself on a job well done. Regularly maintain and inspect your plumbing system to serve your household efficiently and prevent future issues.
Sealing Window Leaks
Guarantee a secure and energy-efficient home by inspecting your windows for cracks or gaps, as these can allow drafts and moisture to seep in, compromising both comfort and structural integrity. Begin by thoroughly cleaning the window frame and surrounding areas with a mild detergent and warm water. This verifies the sealant will adequately adhere to the surface. A caulking gun is used to apply high-quality silicone or latex caulk, which is ideal for weatherproofing. Focus on joints, edges, and any visible gaps.
Start at a corner, apply steady pressure to the caulking gun trigger, and move smoothly along the seam. Maintain an even bead of caulk, approximately 1/4 inch wide, to verify a uniform seal. Smooth the caulk with a caulking tool or a damp finger to eliminate any ridges. Allow the caulk to cure according to the manufacturer’s instructions, typically 24 to 48 hours, to achieve maximum effectiveness.
Safety is paramount; wear safety goggles and gloves to protect against chemical exposure. If working on upper floors, verify secure footing and consider using a stable ladder. Regularly inspect and reseal as needed, verifying your home remains a haven for those you care about.
Patching Roof Leaks
Shifting your focus from windows to the roof, inspect for damaged or missing shingles, as these can lead to significant water intrusion and structural damage if not promptly addressed. Begin by gathering essential tools: a sturdy ladder, a hammer, roofing nails, replacement shingles, and roofing adhesive. Wear non-slip shoes and a safety harness to prevent falls.
Once you’re on the roof, locate the damaged area. Carefully lift the surrounding shingles using a pry bar to expose the nails. Remove the damaged shingle by pulling out the nails with the claw end of your hammer. Verify the underlayment—the protective layer beneath the shingles—is intact. If it’s damaged, replace it before proceeding.
To install the new shingle, slide it into position, aligning it with adjacent shingles. Secure it with roofing nails, placing them in pre-existing nail holes if possible. Apply roofing adhesive beneath the edges to seal it. Press down firmly to verify adhesion, preventing future leaks.
Handling Toilet Leaks
When dealing with toilet leaks, start by turning off the water supply to prevent further water damage and guarantee a safe working environment. Locate the shutoff valve, typically positioned on the wall behind the toilet. Turn it clockwise until the water stops flowing. Next, flush the toilet to empty the tank and bowl, reducing the risk of spills during repairs.
Inspect the toilet components for common leak sources. A faulty flapper valve is a frequent culprit. Remove the tank lid and examine if the flapper properly seals the flush valve seat. Replace it with a compatible model from your local hardware store if worn or cracked. Verify it fits snugly to prevent water from continuously leaking into the bowl.
Check the fill valve for potential leaks. Remove the top cap and inspect the washer for wear. If necessary, replace the washer or the entire fill valve assembly. After replacing parts, turn the water back on and monitor the toilet for any persistent leaks. To maintain hygiene, always use protective gloves when handling toilet components.
Addressing Showerhead Drips
To address showerhead drips, first confirm the water supply to the shower is turned off by closing the main or dedicated shower shutoff valve. Verify the area is dry to prevent slipping. Next, unscrew the showerhead using an adjustable wrench, not damaging the fixture. Inspect the rubber washer inside the showerhead. A worn or cracked washer is often the culprit behind drips. Replace it with a new one that matches the original size and type.
Before reattaching the showerhead, clean any mineral deposits from the threads using a wire brush or vinegar solution to verify a tight seal. Wrap the shower arm threads with the plumber’s tape, applying two to three layers. This creates a waterproof barrier and prevents future leaks. Reattach the showerhead, hand-tightening it and then using the wrench for a snug fit—avoid overtightening to prevent damage.
Turn the water supply back on gradually, checking for drips. If the dripping persists, the issue may be with the shower valve or cartridge, requiring further inspection. Always prioritize safety by wearing protective gloves and eyewear during repairs. Your proactive approach helps maintain household harmony by efficiently serving others’ needs.
Maintaining Proper Drainage
Guaranteeing proper drainage begins by regularly clearing debris from your drains and inspecting for any signs of blockage or slow water flow. Start by removing the drain covers using a screwdriver. Gloves are essential to protect your hands from sharp debris. Use a drain snake or auger to dislodge clogs deep within the pipe. Insert the tool into the drain, turning the handle clockwise until you feel resistance, then gently pull back to extract the blockage.
Pouring hot water and vinegar can help dissolve grease and organic matter for minor accumulations. Be cautious when handling hot liquids to avoid burns. Run water through your sinks and tubs regularly to check for slow drainage. If water pools or drains slowly, it’s a sign that maintenance is required.
Installing drain strainers can prevent debris from entering the system. These devices catch food particles, hair, and other materials before they cause blockages. Ensure they fit securely over the drain opening. Inspect outdoor drainage systems for leaves and twigs, such as gutters and downspouts. Clear these pathways to ensure that water moves away from your home’s foundation, preventing leaks and water damage.
When to Call a Professional
Recognize the need to call a professional if you notice persistent leaks, unusual noises in your plumbing, or water damage that DIY methods can’t resolve effectively. These signs often indicate complex issues requiring expert intervention, such as hidden pipe corrosion or faulty installations. Professionals possess specialized tools like pipe inspection cameras, allowing them to diagnose and address underlying problems precisely.
When dealing with potential water damage, immediately shutting off the main water supply to prevent further harm. Document the damage with photographs for insurance purposes. Ignoring these issues can lead to mold growth, structural damage, and increased repair costs. It’s essential to prioritize safety by avoiding any electrical outlets or appliances in wet areas to prevent electrical hazards.
When contacting a professional, clearly describe the symptoms, such as low water pressure or gurgling sounds, to facilitate an accurate assessment. Confirm the plumber is licensed and insured to guarantee quality work. Verifying credentials and seeking references from previous clients can provide peace of mind. By recognizing when to call in experts, you safeguard your home’s integrity and secure long-term solutions, supporting your commitment to serving others effectively.
Conclusion
Coincidentally, mastering DIY leak repairs saves money and empowers you with practical skills. Equipped with tools like pipe wrenches and plumber’s tape, you can confidently tackle issues from dripping faucets to sealing window leaks. Always wear safety goggles and gloves to protect yourself. Remember, if leaks persist despite your best efforts, calling a professional is essential. This guarantees your home remains efficient and damage-free, safeguarding your investment and peace of mind.